Create Your First Story
STEP 1
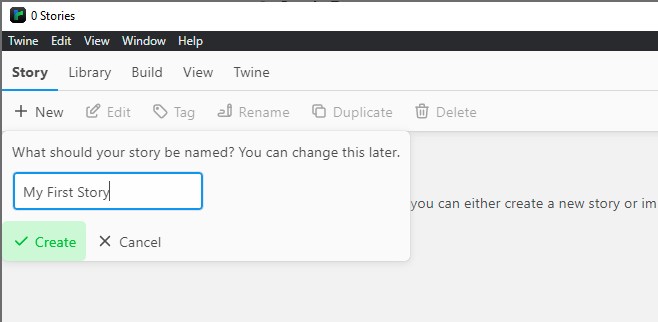
Open Twine and click +New button under Story tab. Enter a name for your story. Click Create button.
STEP 2
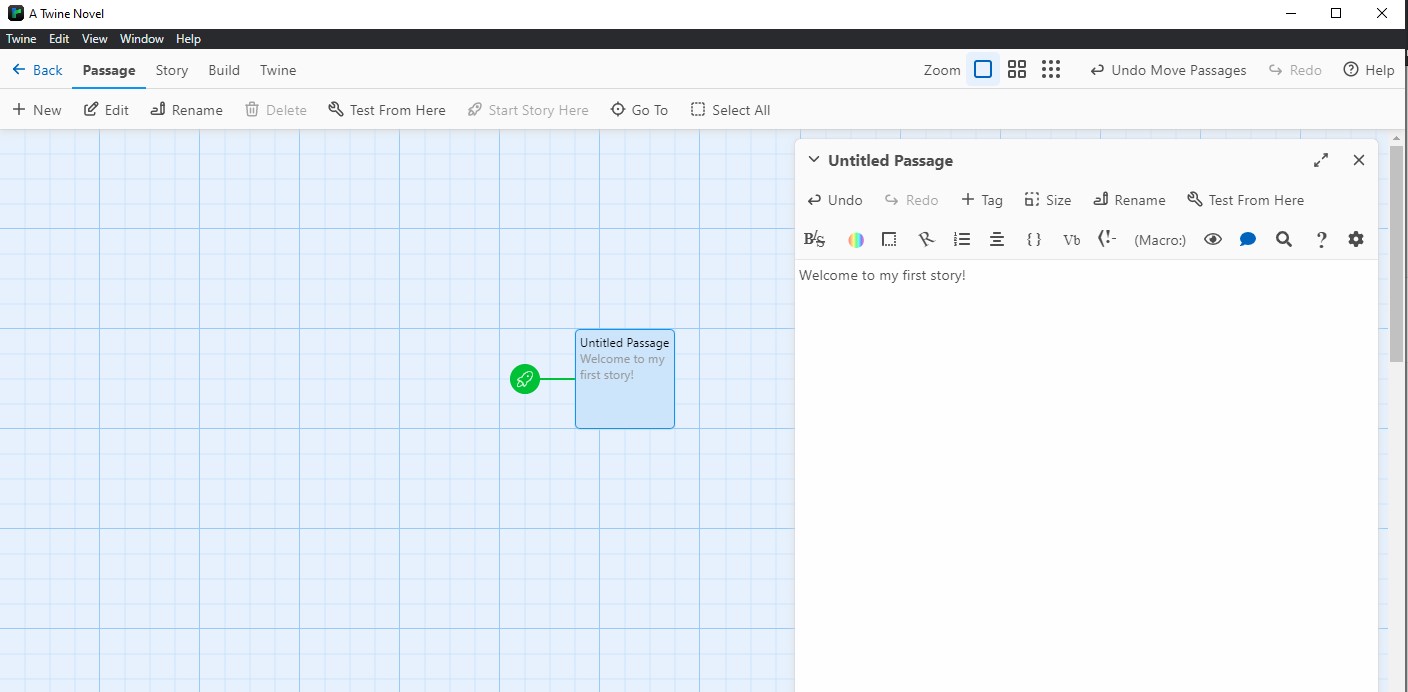
Once you create your story, Twine will open the Story Map screen to create passages and links. Every new story starts with a single passage which appears on the Story Map as a square with a green rocket icon attached to it. When you double click on it, Twine opens a dialogue box to edit the passage.
You find yourself in a room with two doors.
STEP 3
Add Links. Use double square brackets ([[ ]]) to create a link to another passage.
You find yourself in a room with two doors.
[[Go through the left door]]
[[Go through the right door]]
The text “Go through the left door” and “Go through the right door” are clickable links that will lead to new passages when clicked.

The pipe (|) can be used to rename the link.
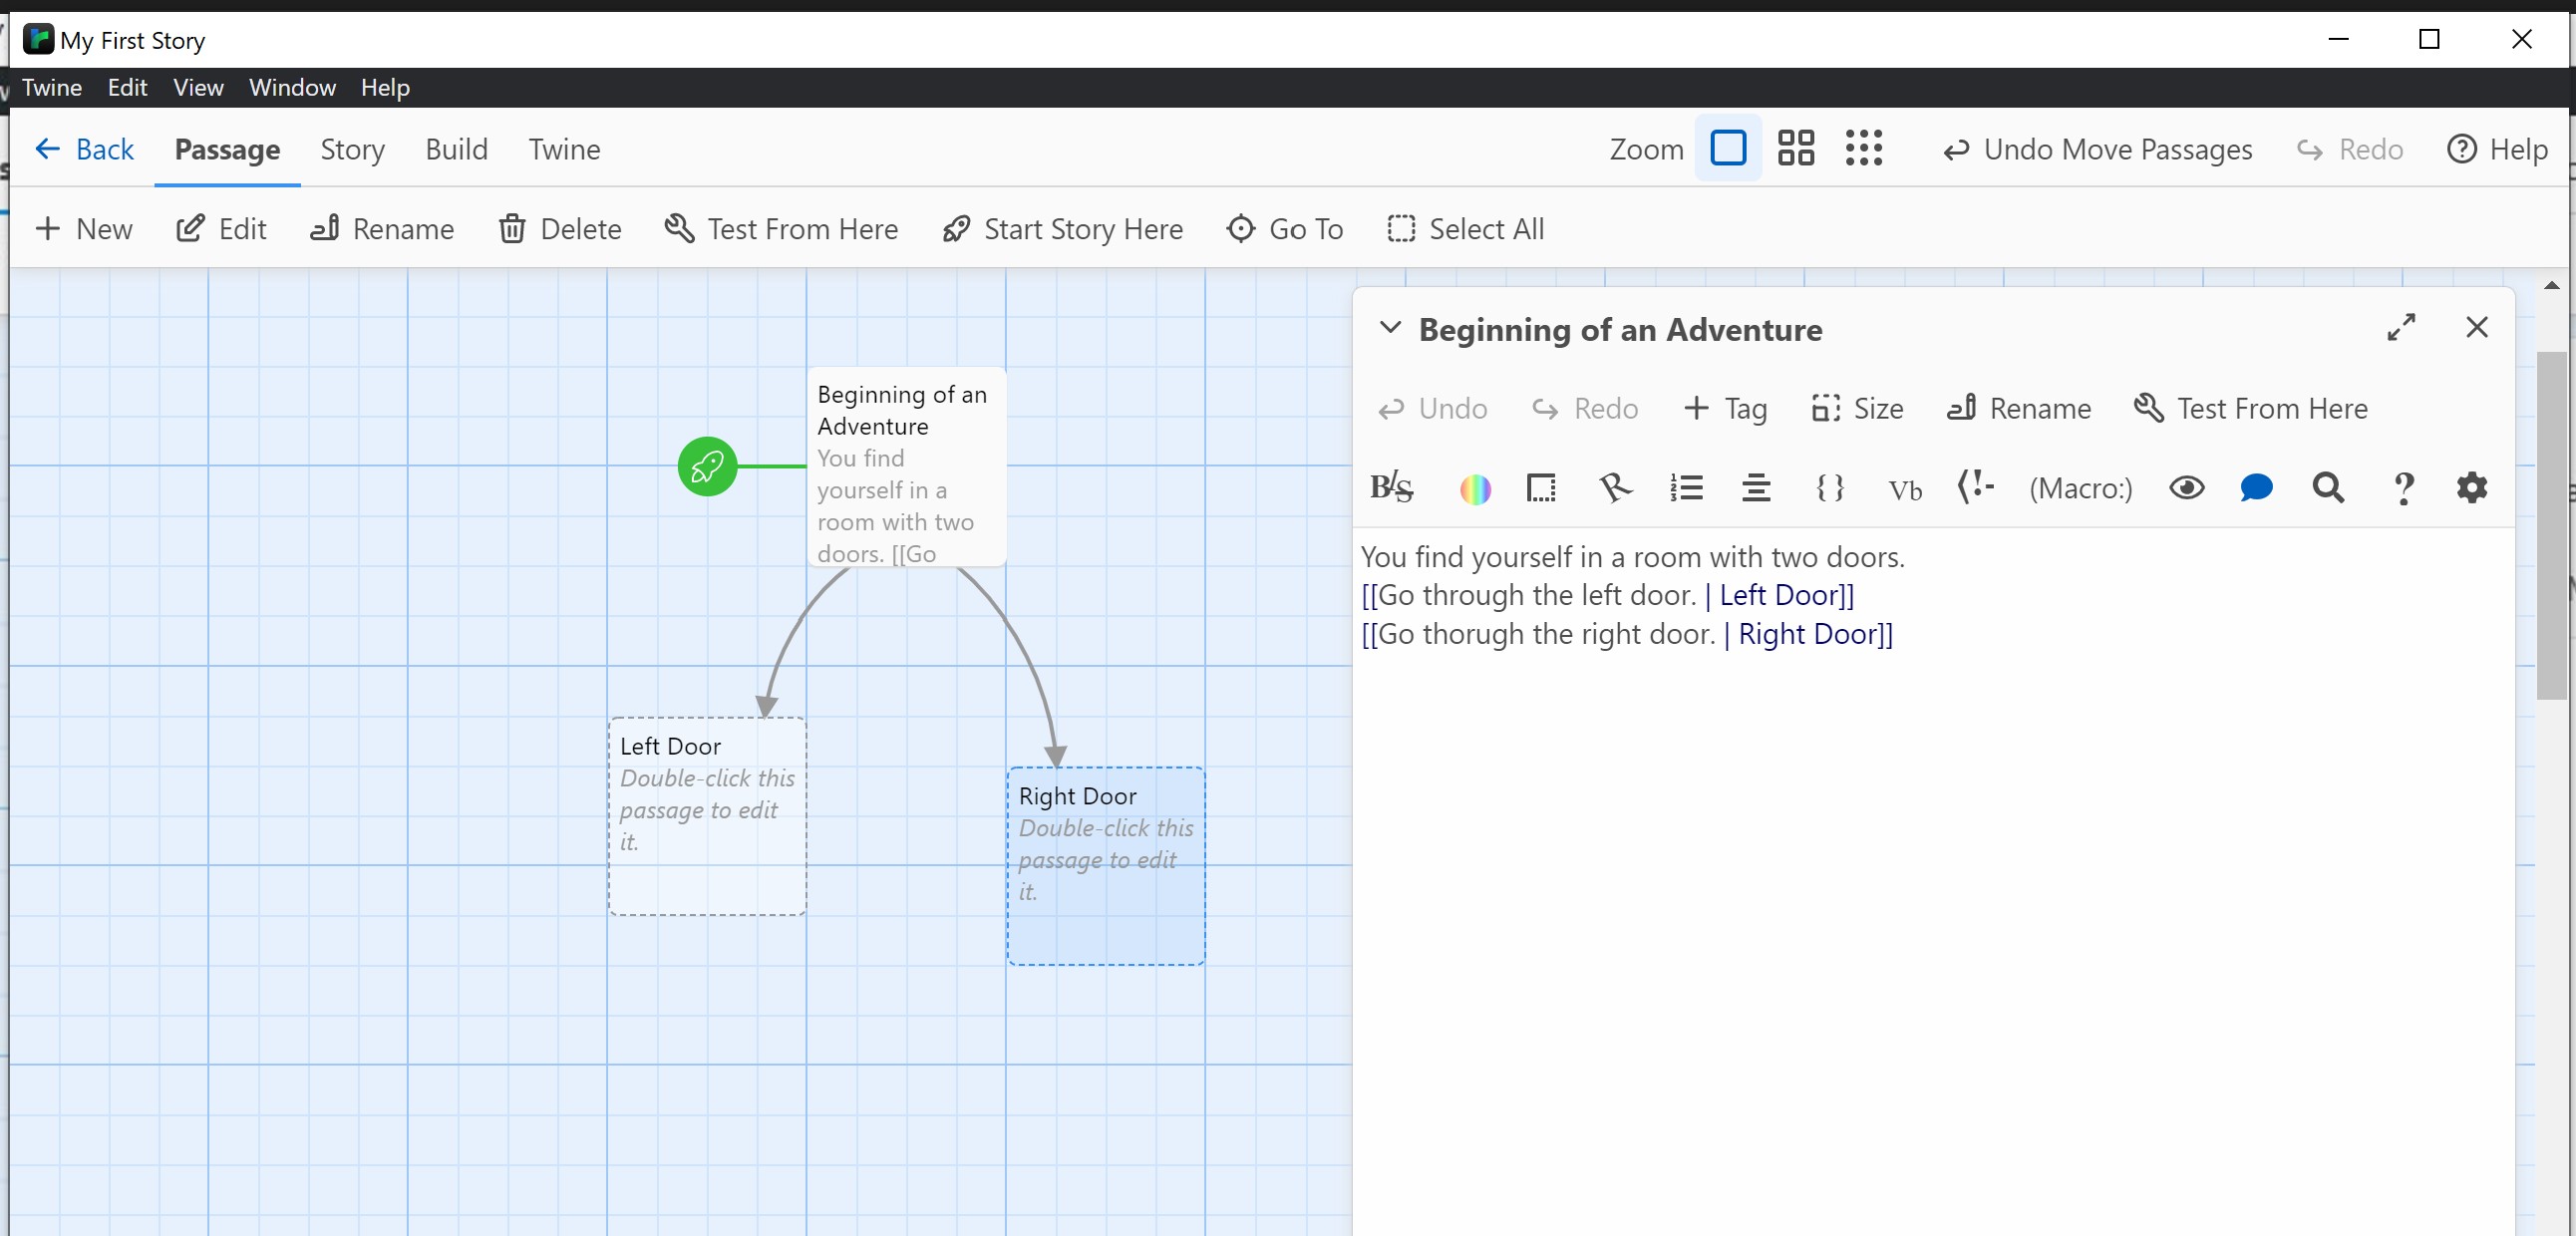
You find yourself in a room with two doors.
[[Go through the left door.|Left Door]]
[[Go through the right door.|Right Door]]
In this example, “Go through the left door” and “Go through the right door” are clickable links. The text after the pipe (|) is the displayed link text, and the text before the pipe is the name of the passage to which the link leads.
STEP 4
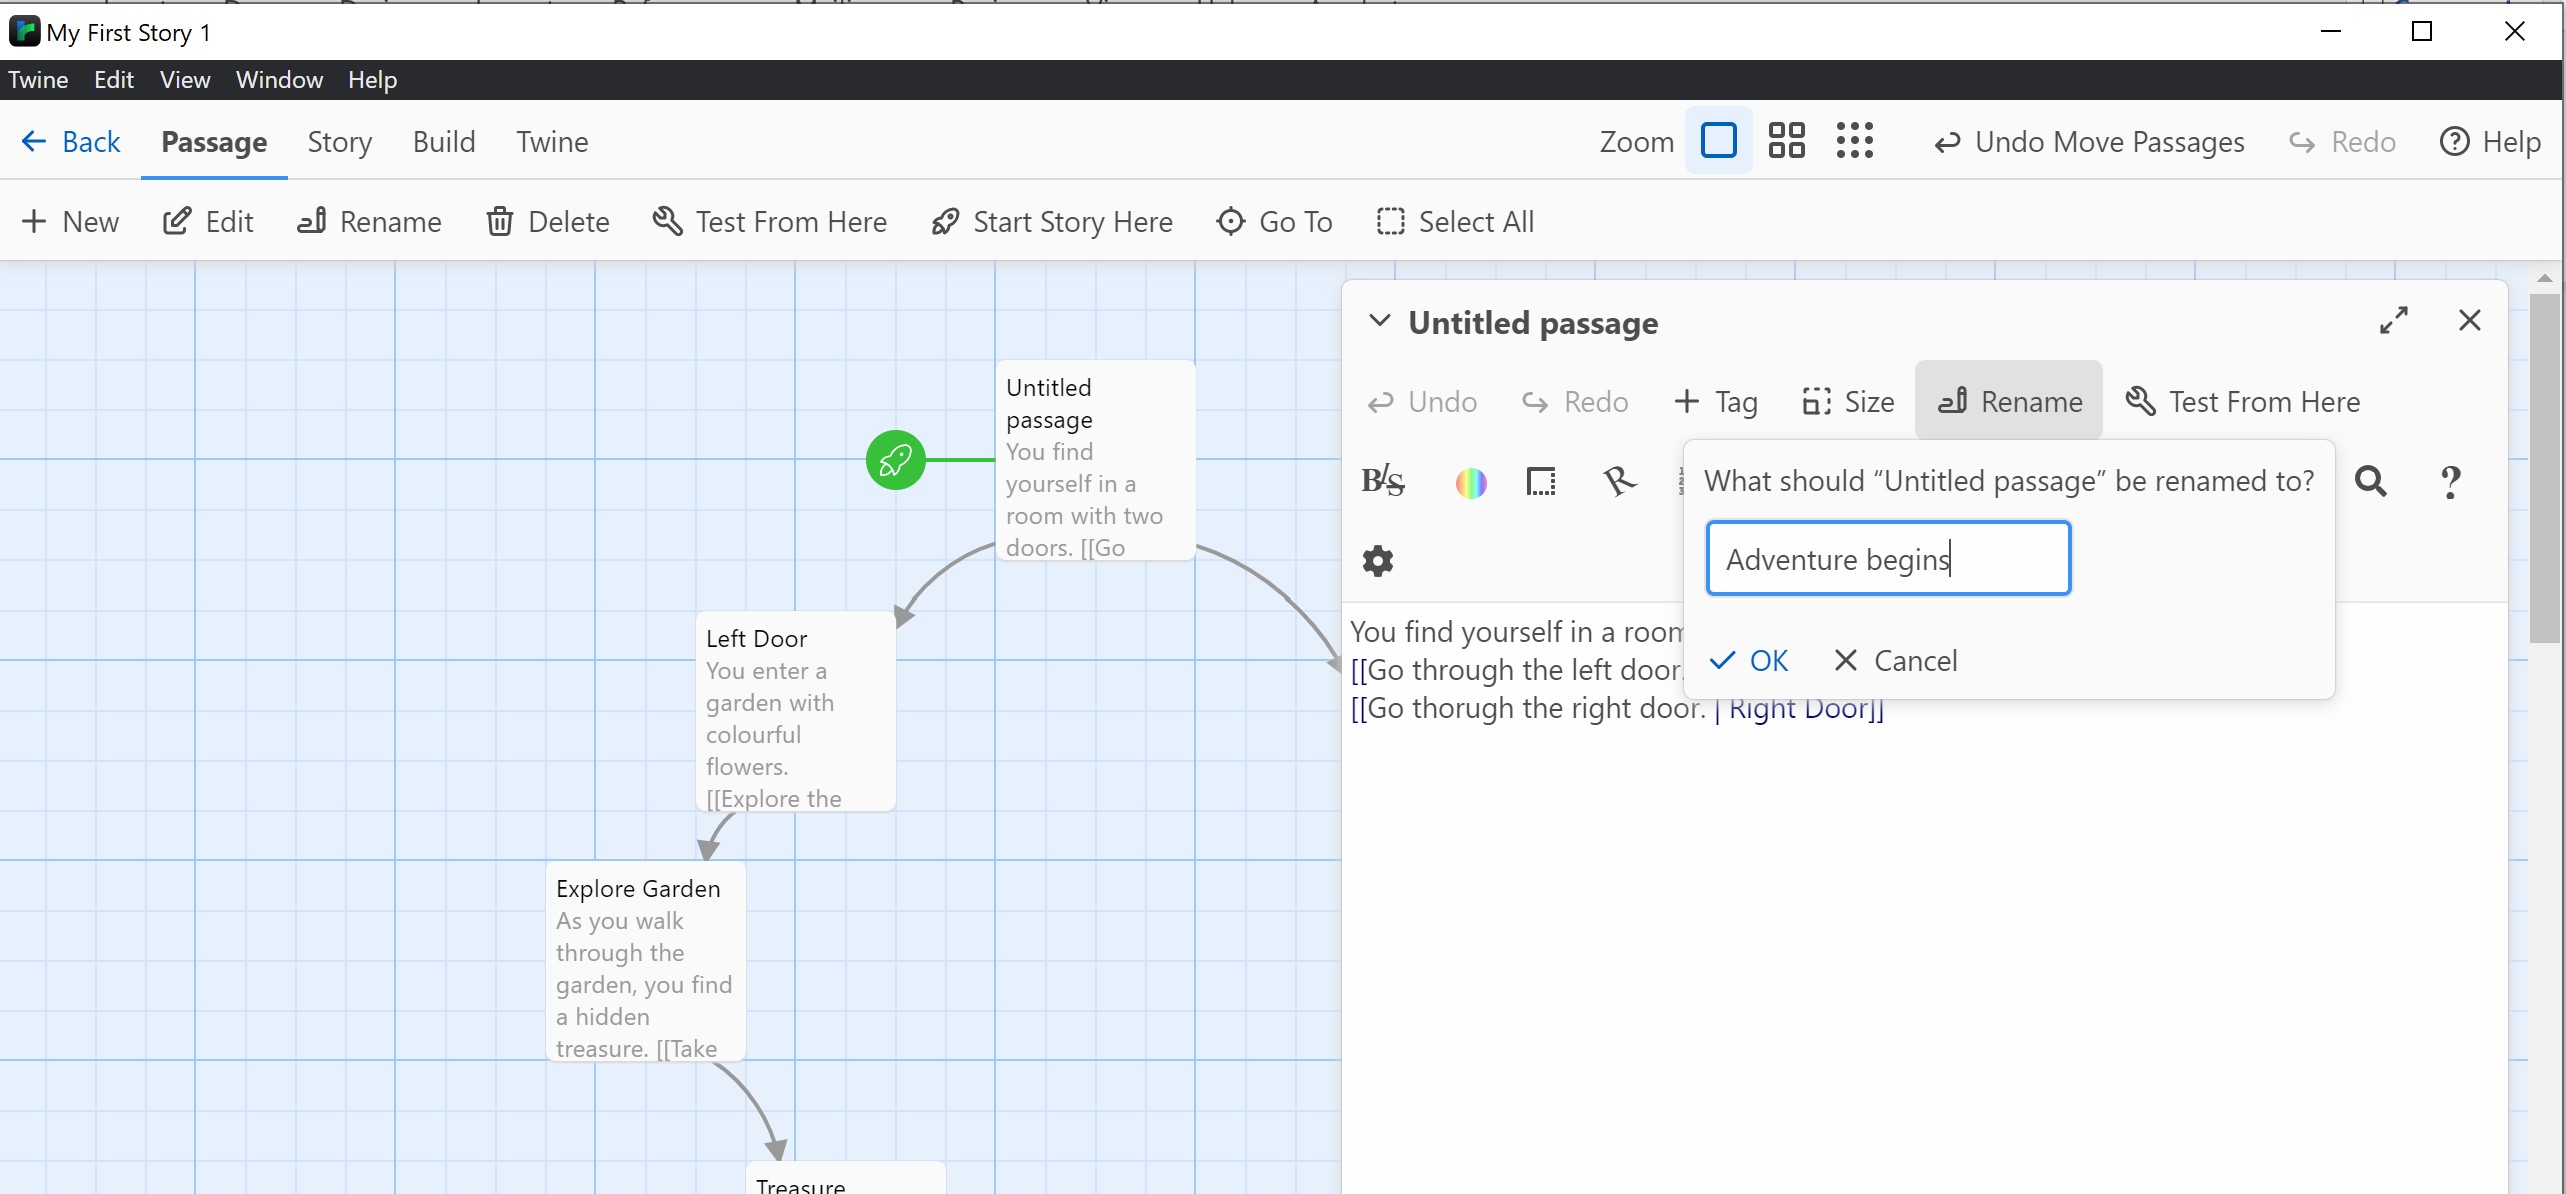
Create Linked Passages | Double click on the newly appeared passages on the Story Map to open the passage editor.
You enter a garden with colorful flowers.
[[Explore the garden.|Explore Garden]]
You find a dark cave.
[[Enter the cave.|Dark Cave]]
Here, the Left Door and Right Door passages are linked to from the previous passage. The links take the reader to different parts of the story based on their choices.
STEP 5
Continue creating linked passages to build the branching structure of your narrative.
As you walk through the garden, you find a hidden treasure.
[[Take the treasure.|Treasure]]
Inside the cave, you encounter a dragon.
[[Confront the dragon.|Confront Dragon]]
The link texts are customized for clarity, but the passage names remain distinct. You can’t give the same name to different passages.
STEP 6
Add Endings or Further Links | Conclude your story or provide further choices in linked passages.
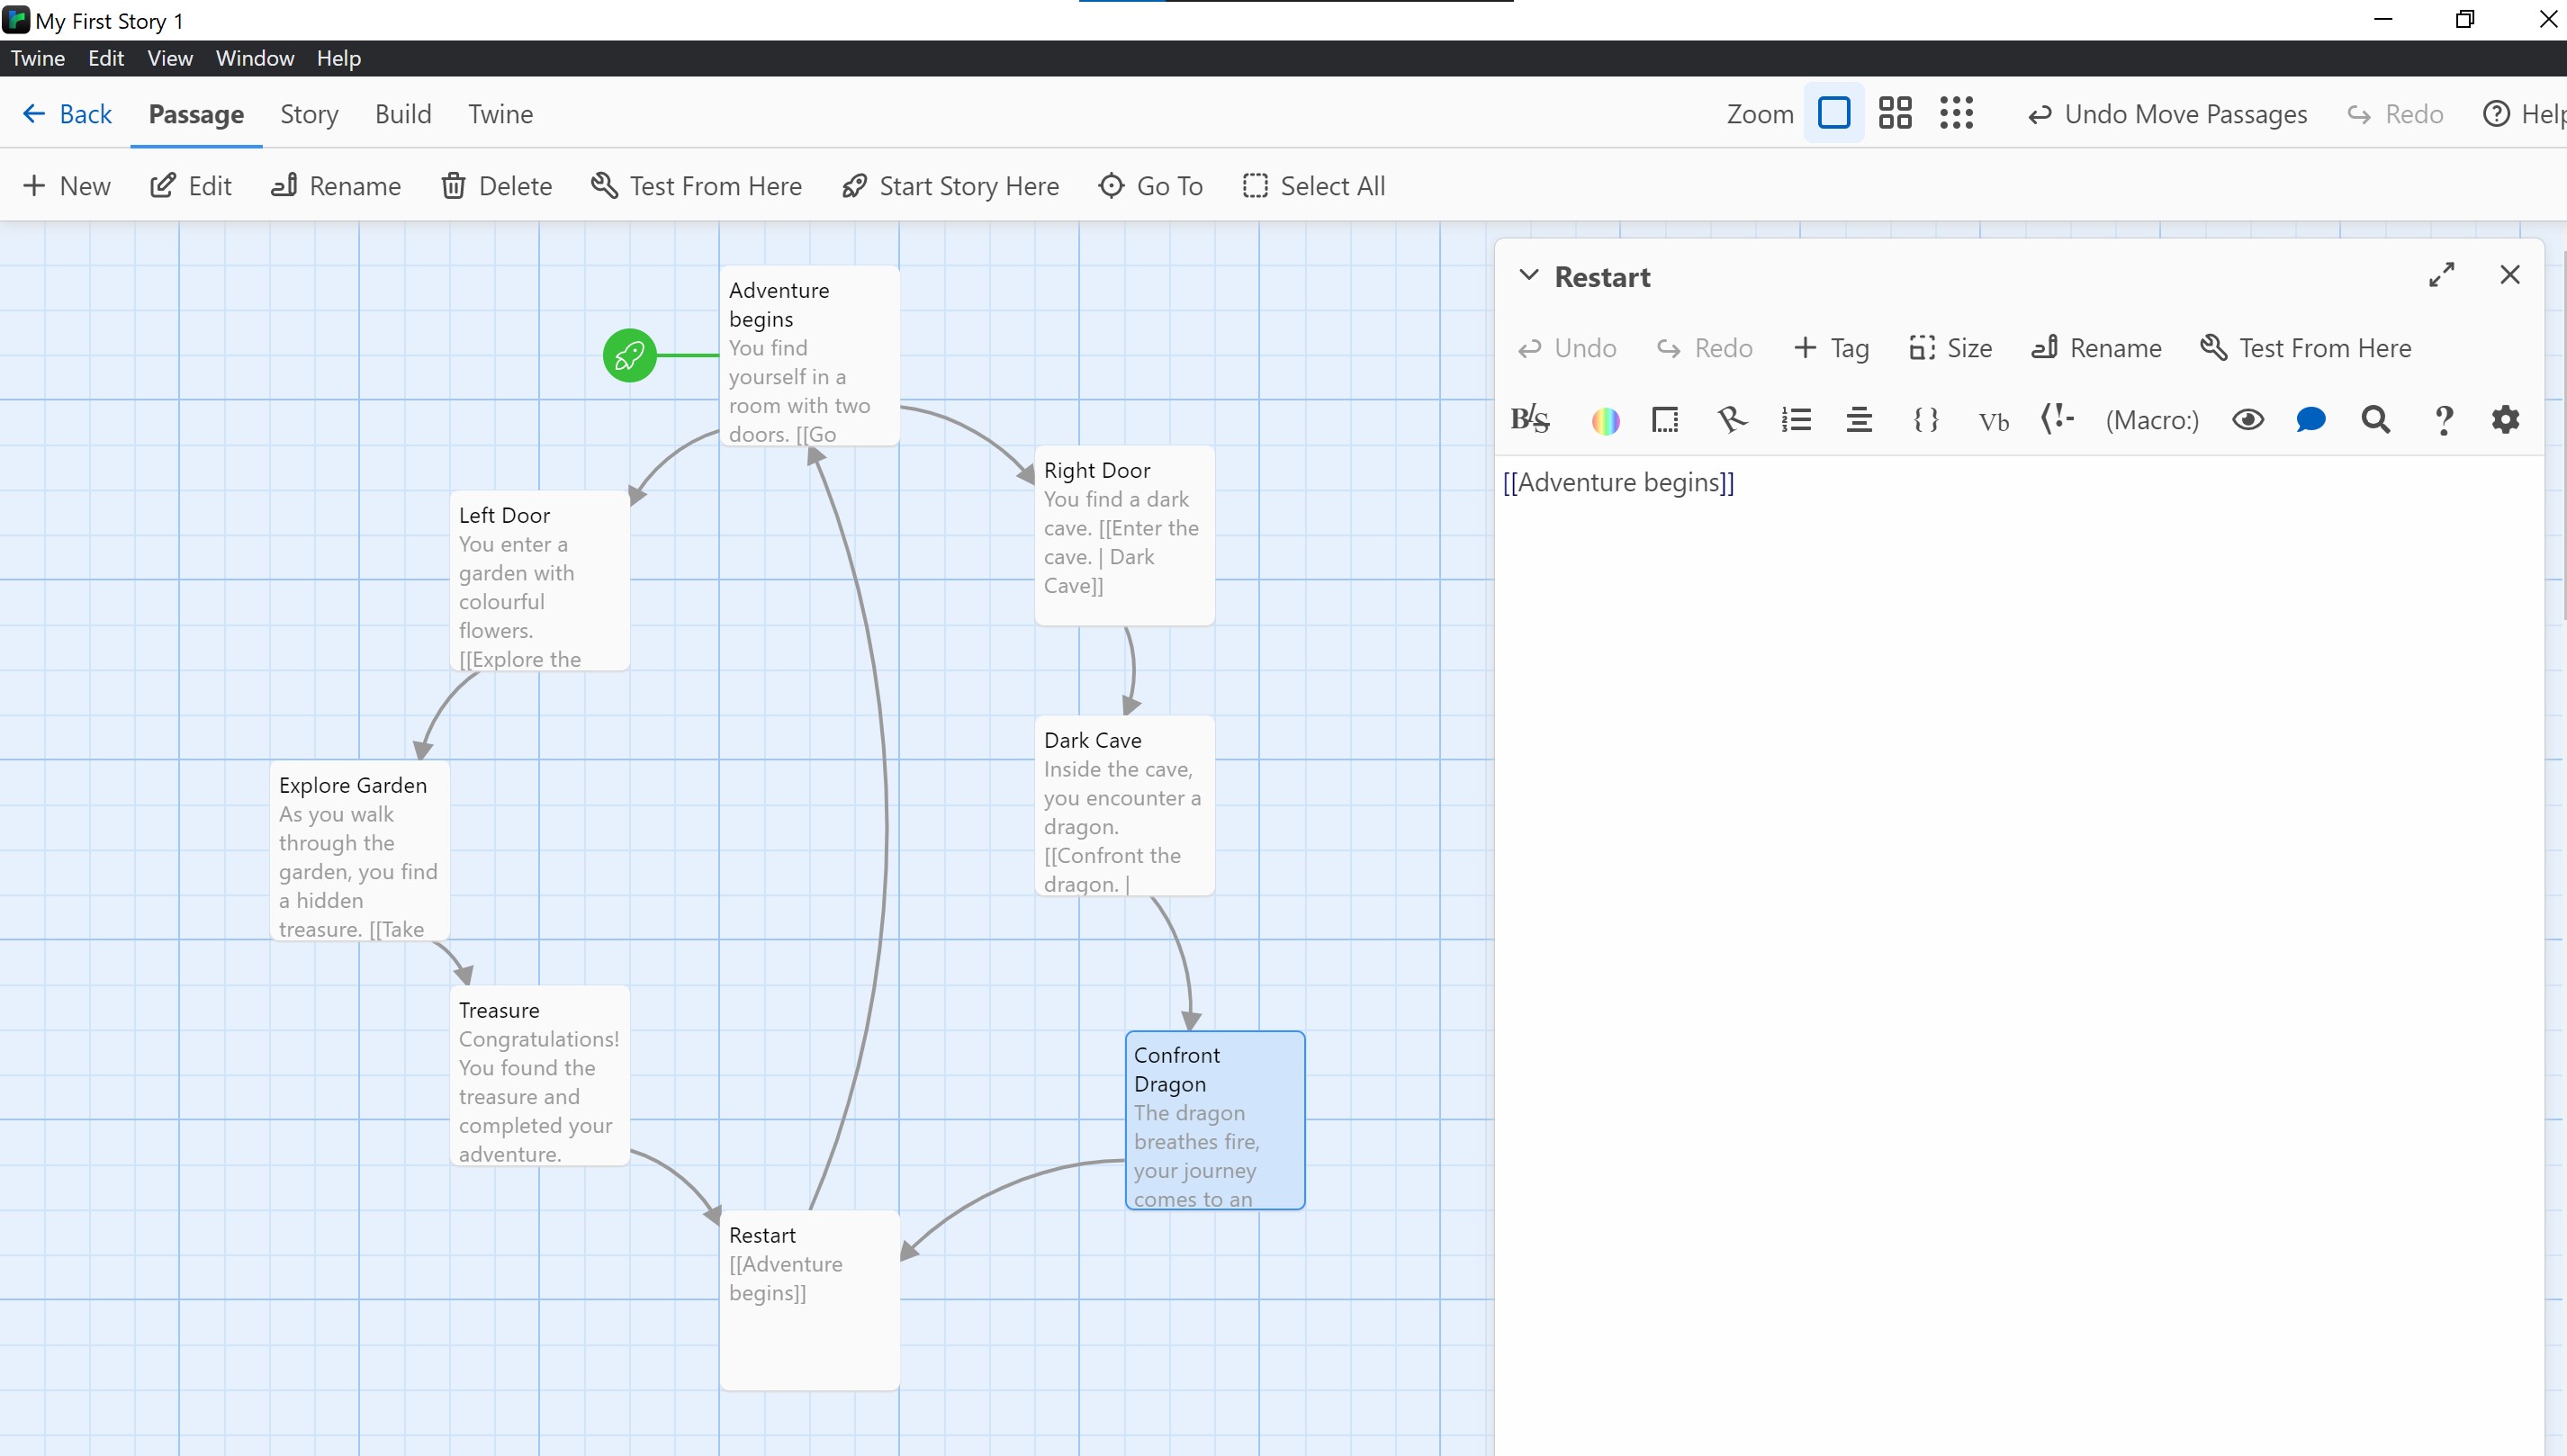
Let’s end our story.
Congratulations! You found the treasure and completed the adventure.
[[Restart]]
The dragon breathes fire, and your journey comes to an end.
[[Restart]]
In these examples, Restart is the displayed link text leading to the first passage.
STEP 7
Rename your starting passage as Adventure begins before linking it to the last passage. Open the passage editor for the starting passage by double clicking on it. Then use Rename button to change the name of the passage.
Let’s link the last passage to the first passage and complete your first story! Open the passage editor for Restart.
[[Adventure begins]]
Congragulations! You created your first story/game with Twine. Let’s [play]